 1,002 puzzles in the app
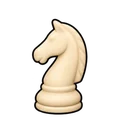
The Vuković mate is a team effort. A rook gives the check, a knight takes away the squares the rook can’t reach, and a third piece, usually the king or a pawn, supports the rook. Each piece has one job, and together they leave the defending king with nothing.
It shows up both in middlegame attacks and in endgames, especially when one side has a rook and knight against a king pushed to the edge.
What the final position looks like
A typical version on the back rank:
- Black’s king is on e8.
- A white rook gives check from e7, right in front of the king.
- A white knight on e6 covers both d8 and f8.
- White’s king on d6 (or a pawn on d6 or f6) protects the rook.
Run through the escape squares. d7 and f7 are covered by the rook along the seventh rank. d8 and f8 are both covered by the knight, which is the neat part: a knight on e6 hits the two back-rank squares beside the king at once. The rook can’t be captured because it is protected. That is mate.
The same idea appears on other edges too. The constant is the division of labour: the rook checks, a third piece holds the rook in place, and the knight seals the squares the rook leaves open.
How the position builds up
Look for a Vuković mate when:
- The enemy king is on the edge of the board with its own pieces gone or far away.
- Your rook can reach the square directly in front of the king.
- Your king or a pawn already stands next to that square, ready to protect the rook.
- Your knight can hop to a square that covers the king’s two sideways escapes.
In endgames the usual route is to bring your king close first, then place the knight, and only then deliver the rook check. In middlegames a far-advanced pawn often plays the supporting role, for example a pawn on the sixth rank that protects the rook’s landing square.
Common errors
Attackers often give the rook check too early. Without the knight in place, the king just steps sideways and you are left chasing it. Patience pays: set the knight first, then check.
Another mistake is choosing the wrong knight square. A knight that covers only one of the two side squares is not enough. Before you move, count both escape squares and make sure each one is covered.
Defenders usually fall into this pattern by drifting to the edge instead of staying central. When you are down material in an endgame, keep your king in the middle as long as possible. Also look for chances to attack the rook’s protector or to check the attacking king, which can break the coordination.
Tips for training
- In rook and knight positions, imagine the final picture first and work backwards to see which piece needs to arrive last.
- Remember the knight’s special trick: from the square two in front of the king, it covers both squares beside it.
- If the rook is unprotected, ask what your king or a pawn can do to support it before you check.
With a bit of practice you will spot this pattern quickly and stop letting kings escape from winning positions.